#Intro
TeamWork - Project Management System v 1.3.2
Thank you for purchasing our item.
Admin:
User: admin@themeposh.xyz
Password: admin123456
Staff:
User: staff@themeposh.xyz
Password: staff123456
Client:
User: client@themeposh.xyz
Password: client123456
- Last Update: 09/05/2025
- created: 01/01/2020
- Author: ThemePosh
- Email: tspprt7@gmail.com
Thank you for your interest in my item. If you have any questions that are beyond the scope of this help file, please feel free to contact with support page TeamWork - Project Management System Support or for very critical issue, you can contact with email: tspprt7@gmail.com [Email reply can be delay]. Thank you so much.
#Installation
For using TeamWork - Project Management System, first you have to confirm that, TeamWork - Project Management System is already installed in your site. Also confirm that you have product available in your store. Then install TeamWork - Project Management System.
- PHP 8.2
- BCMath PHP Extension
- Ctype PHP Extension
- Fileinfo PHP extension
- JSON PHP Extension
- Mbstring PHP Extension
- OpenSSL PHP Extension
- PDO PHP Extension
- Tokenizer PHP Extension
- XML PHP Extension
- GD PHP Extension
- PHP CURL Module Enable
Step-1:
- Extract the archive file on your machine that you've downloaded from CodeCanyon.
- Upload your downloaded zip file to your sever using any FTP client or cpanel.
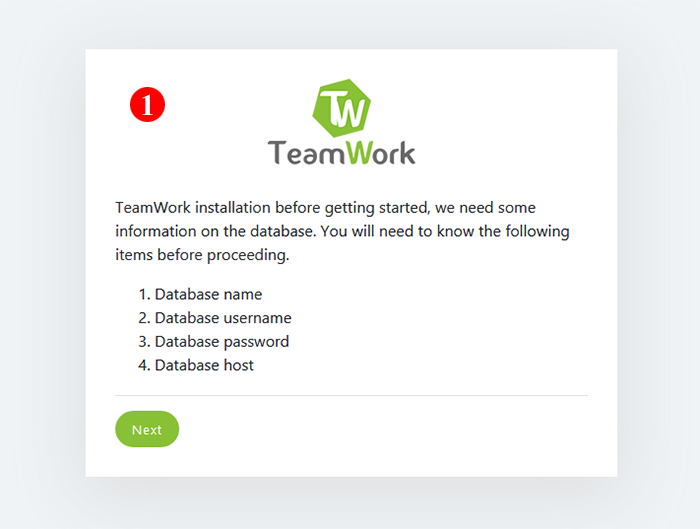
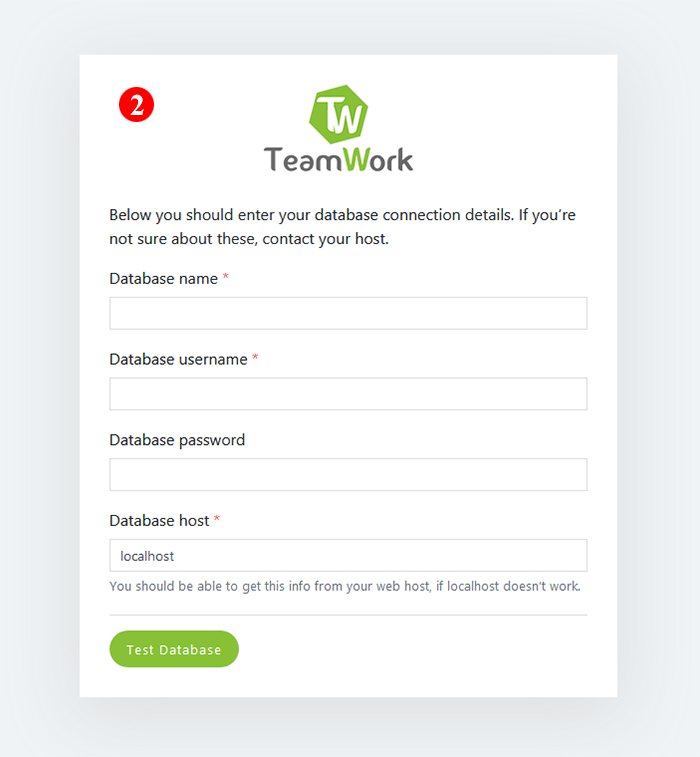
- Create a MySql Database via your web hosting providers Control Panel (e.g. cPanel). Once you have created the database, remember the following information:
- Database name
- Database username
- Database password
- Database host
Step-2:
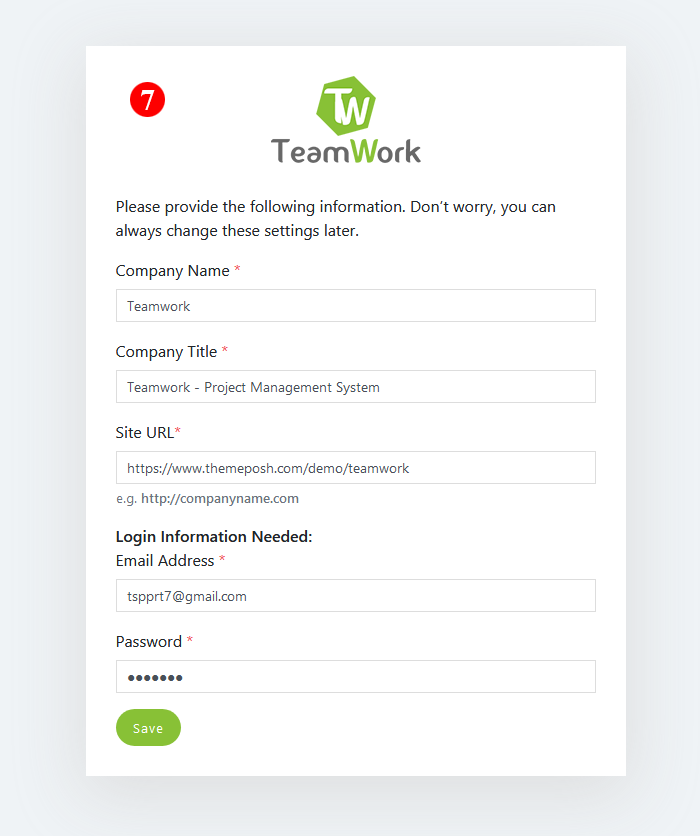
Open your web browser and enter your url (http://yourdomain.com/installer) or if files is in your sub directory enter your url with directory name like http://yourdomain.com/foldername/installer in the address bar.
The following screen will appear


#Clients
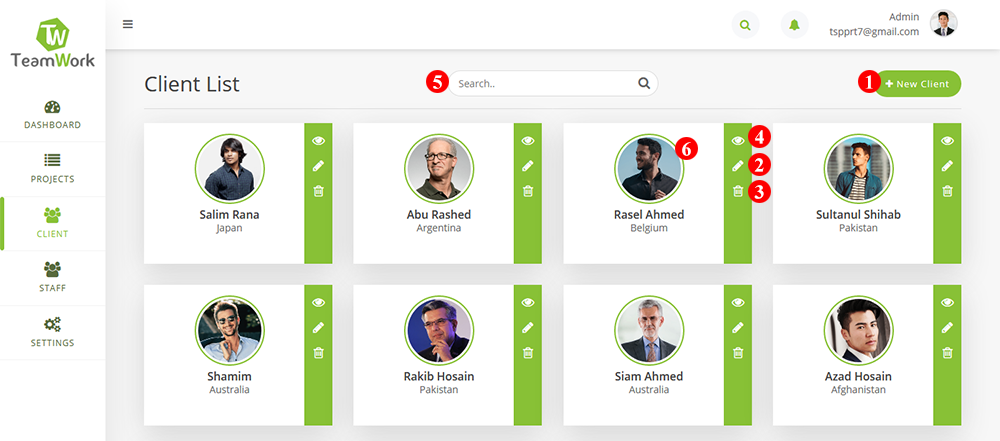
List of client features:
- If you want to create new client then click on the New Client button.
- If you want to edit exist client then click on the Pencil Icon.
- If you want to delete exist any client then click on the Trash Icon.
- View existing any client click on the Eye Icon or Profile Photo.
- Search all the existing clients by using Search bar.
#Staffs
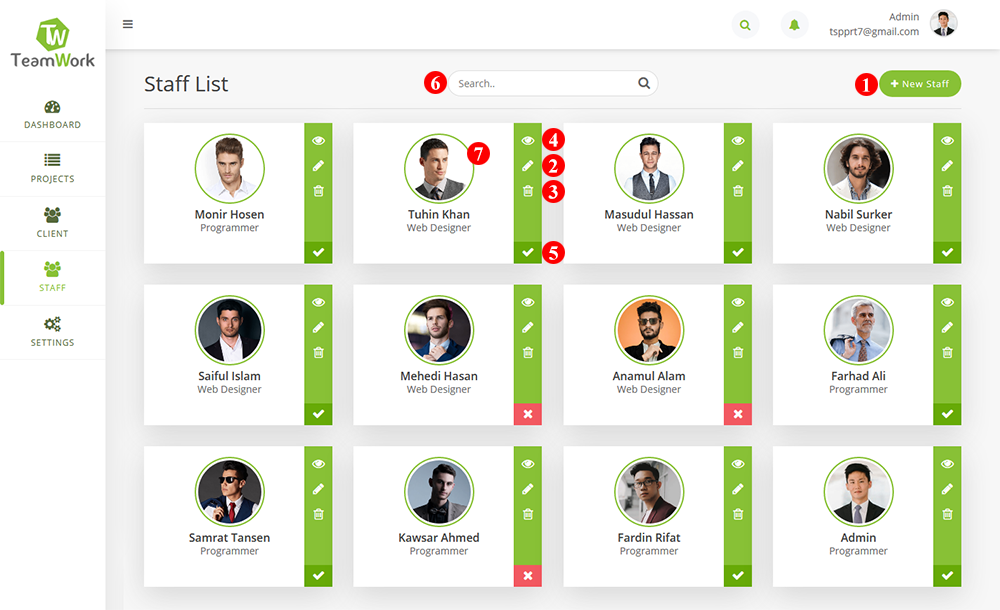
List of staff features:
- If you want to create new staff then click on the New Staff button.
- If you want to edit exist staff then click on the Pencil Icon.
- If you want to delete exist any staff then click on the Trash Icon.
- View existing any staff click on the Eye Icon or Profile Photo.
- If you want to active/inactive staff then click on the active/inactive button (1,2).
- Search all the existing staffs by using Search bar.
- New/Existing staff role set(1,2).
#Projects
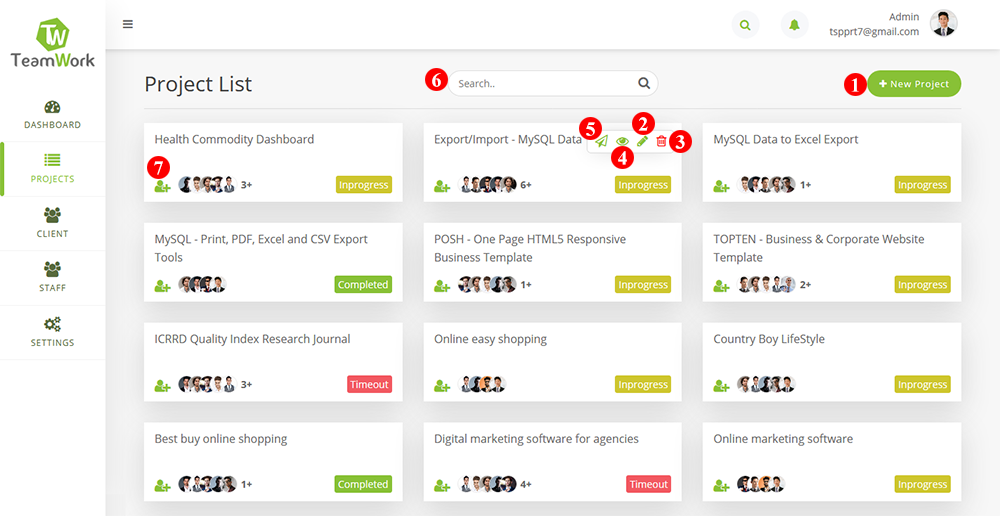
List of project features:
- If you want to create new project then click on the New Project button.
- If you want to edit exist project then click on the Pencil Icon.
- If you want to delete exist any project then click on the Trash Icon.
- View existing any project click on the Eye Icon.
- If you want to Go To Task Board then click on the Paper plane Icon.
- Search all the existing projects by using Search bar.
- If you want invite project then click on the user plus icon.
- If you want project status change then click on the Pencil Icon (2).
- To change project deadline click on the Pencil Icon (2).
- To change project client click on the Pencil Icon (2).
#Tasks Board
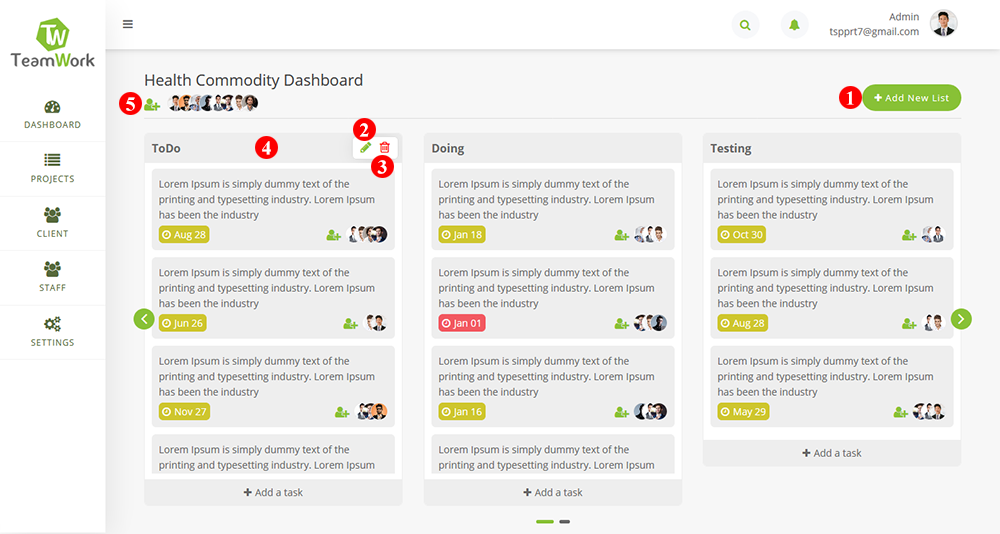
Task List:
- Create new task list using the Add New List button.
- Edit existing task list using the Pencil Icon.
- Delete existing task list using the Trash Icon.
- Easily drag and drop task list position change.
- If you want invite project then click on the user plus icon.
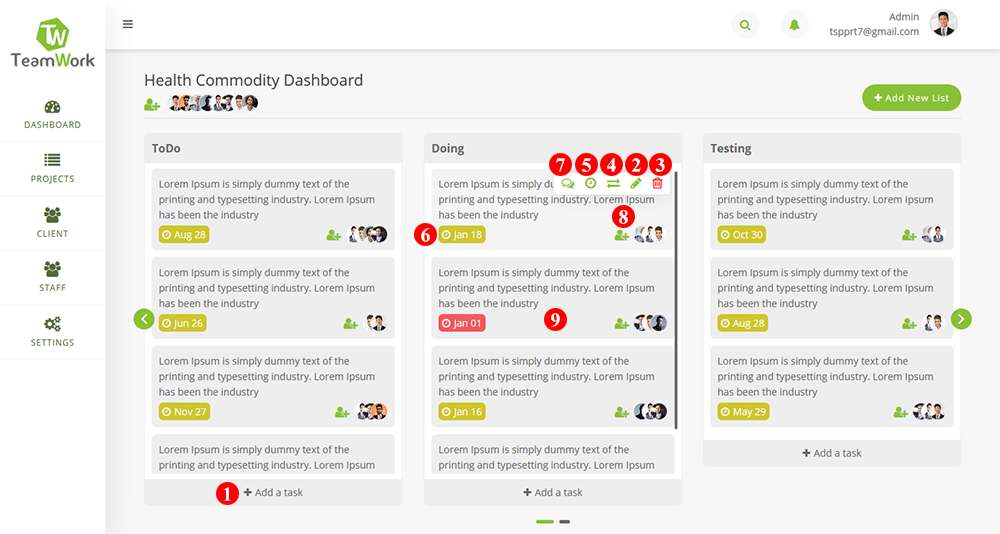
Tasks:
- Create new task using the Add a task button.
- Edit existing task using the Pencil Icon.
- Delete existing task using the Trash Icon.
- Move the task list position change.
- If you want change task status then click on the clock icon.
- Change task status then click on the clock icon.
- If you want add comments then click on the comments icon.
- If you want invite task then click on the user plus icon.
- Task position change drag and drop.

Task Activity:
- Add comments
- Add Attachment
- Edit existing comment using the Pencil Icon.
- Attachment add in existing comment(8).
- Delete existing comment using the Trash Icon.
- Edit attachment name click on the Pencil Icon.
- Delete attachment click on the Trash Icon.
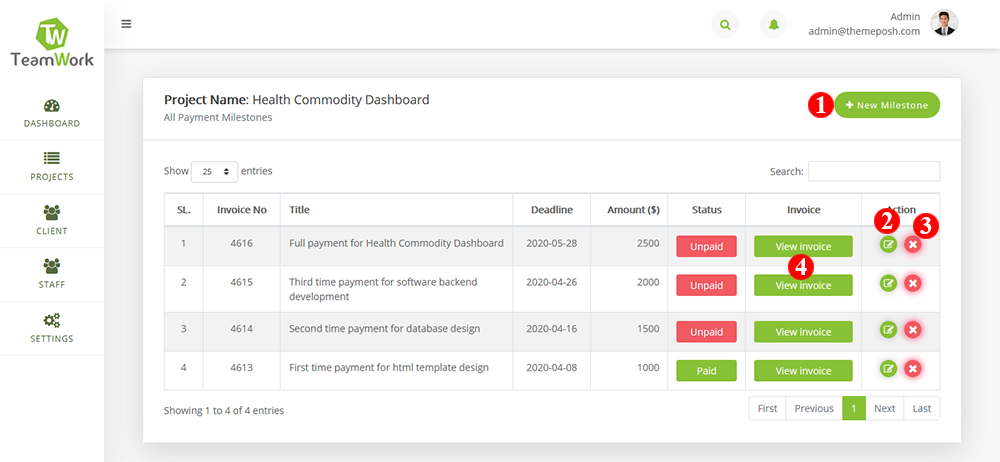
#Invoices
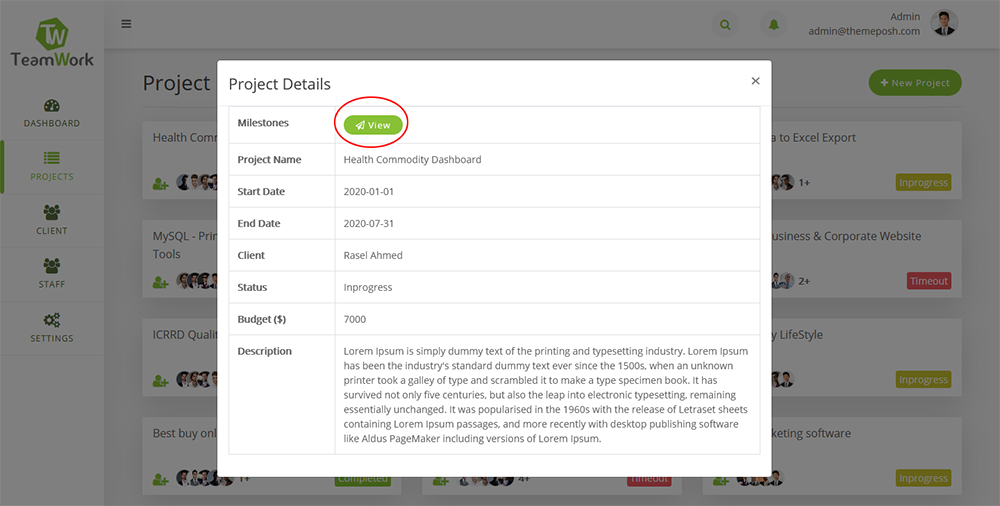
- Go to Projects menu
- Click on the View button
- You can create/edit/delete a milestone.
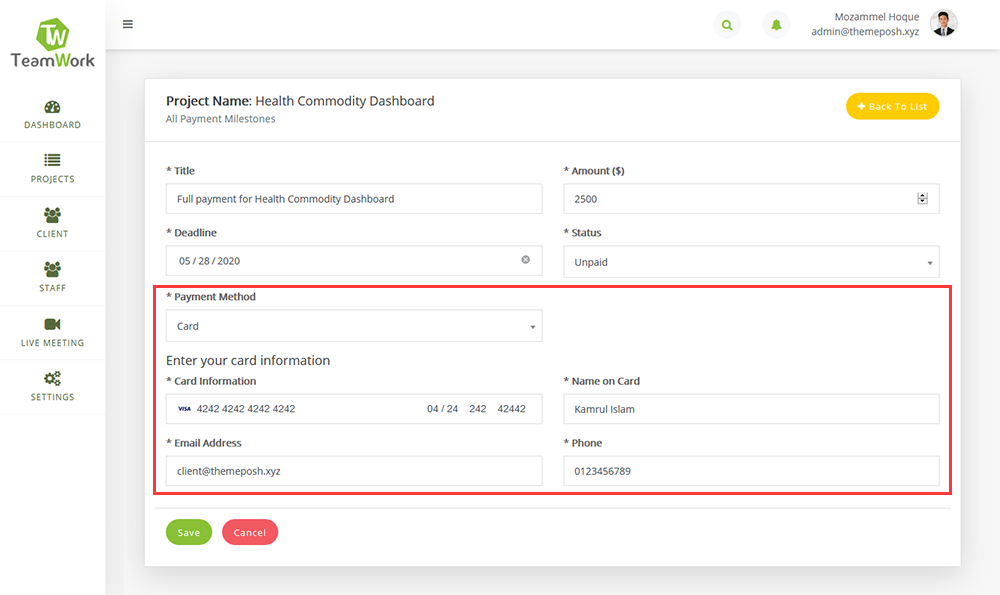
- Stripe Payment Method
- Payment method select card in drop down list and provide your card information.

List of invoice features:
- If you want to create new invoice then click on the New Milestone button.
- If you want to edit exist invoice then click on the Pencil Icon.
- If you want to delete exist any invoice then click on the Remove Icon.
- View existing any invoice click on the View invoice. You can download pdf invoice or can get printable invoice as well.
- All milestone invoice has it own specific title
- You can track the milestone deadline dates.
- You can track the paid & unpaid status of invoices.
- You can edit the amount.
#Settings -> Global Setting
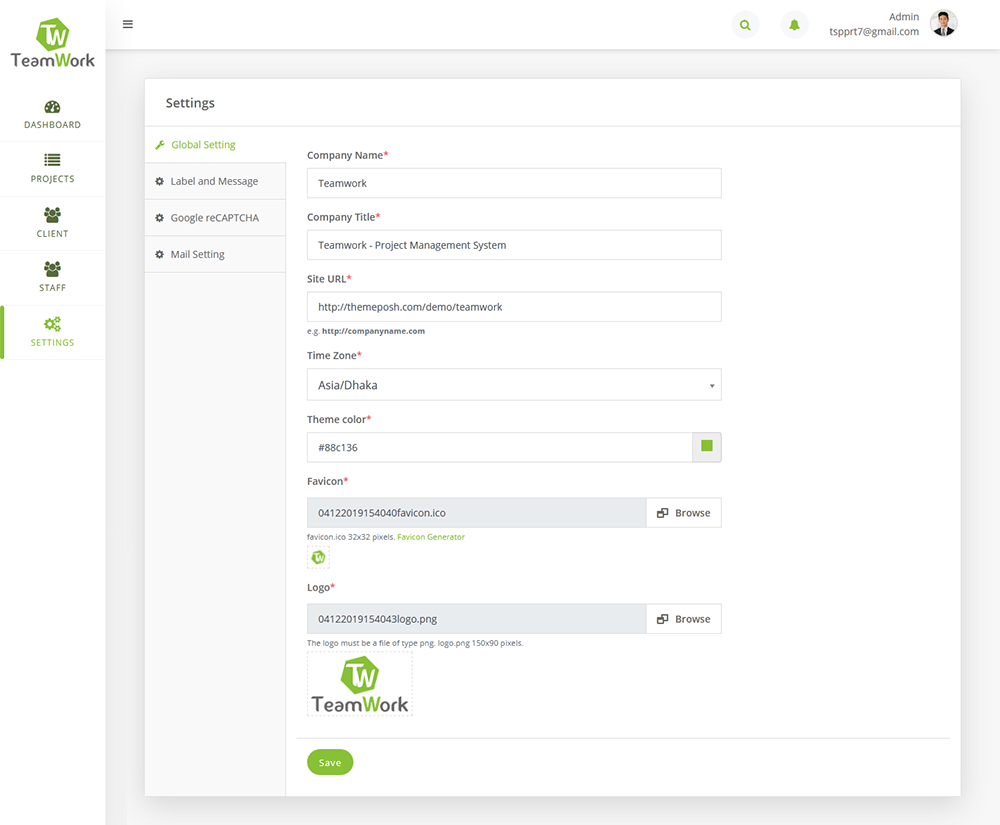
Global Setting:
- You can change:
- Company Name
- Company Title
- Site URL
- Time Zone
- Theme color
- Favicon
- Logo
#Settings -> Label and Message
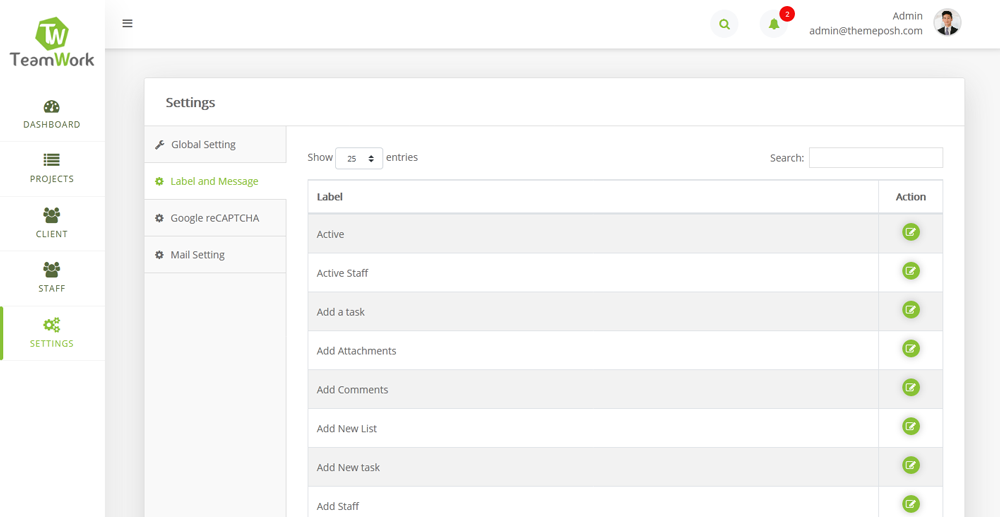
Label and Message:
- You can change label and message.
#Settings -> Google reCAPTCHA
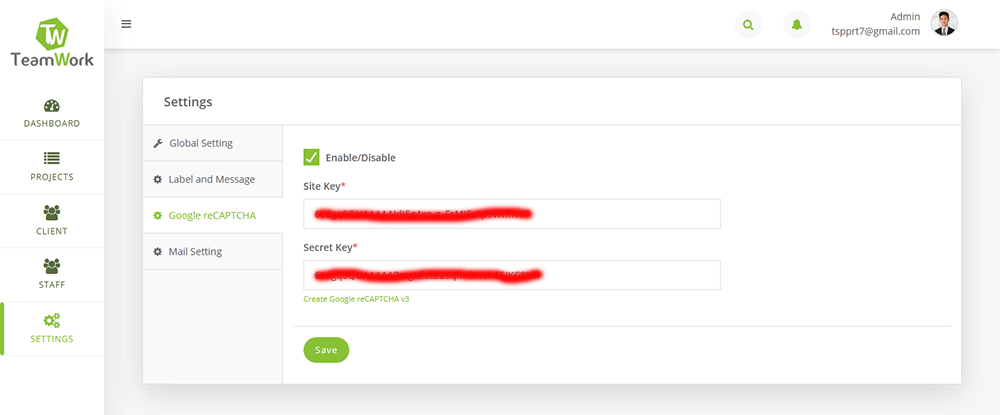
Google reCAPTCHA:
- If you want use Google reCAPTCHA in your site then at first Create Google reCAPTCHA v3.
- Google reCAPTCHA Enable/Disable for Forgot your password? and Sign up for an account.
- You can change Site Key, Secret Key and save.
#Settings -> Mail Setting
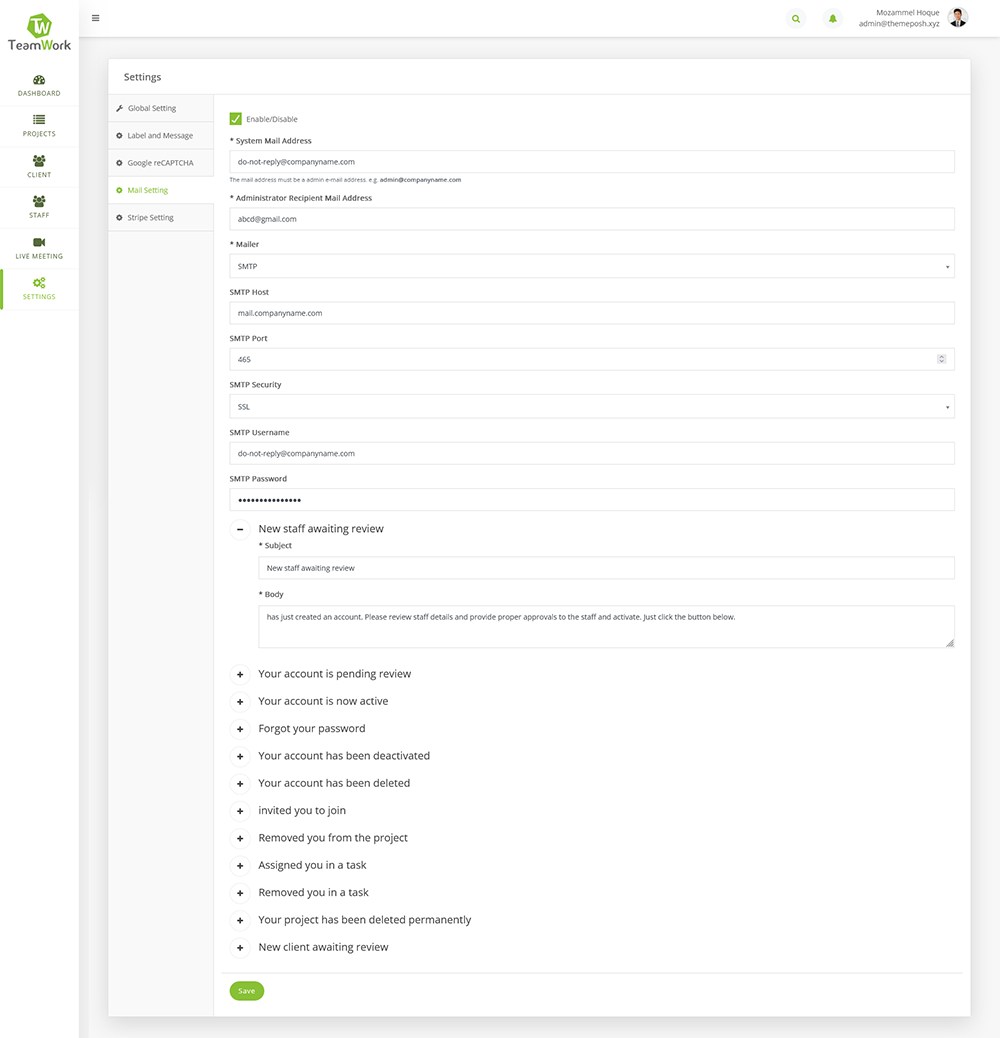
Mail Setting:
- If you want to get email notifications in your site then you select checkbox enable.
- If you want do not email notifications then you checkbox select disable.
- Change system mail address (The mail address must be a admin e-mail address. e.g. admin@companyname.com).
- You can change administrator recipient mail address(any mail address).
- You can change mail subject and mail body.
#Settings -> Stripe Settings
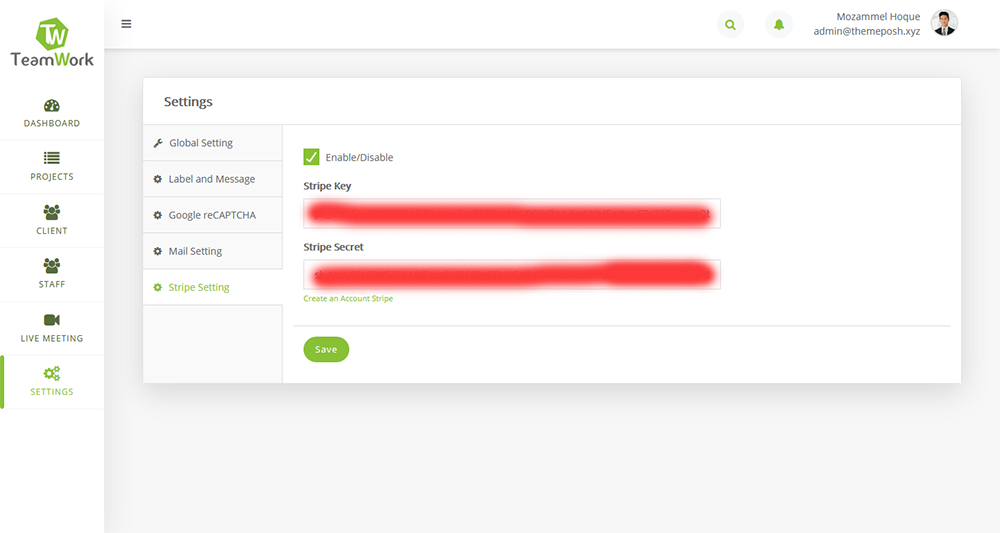
Stripe Settings:
- If you want use Stripe in your site then at first Create https://stripe.com/docs.
- You can change Stripe Key, Stripe Secret and save.
#Edit Profile
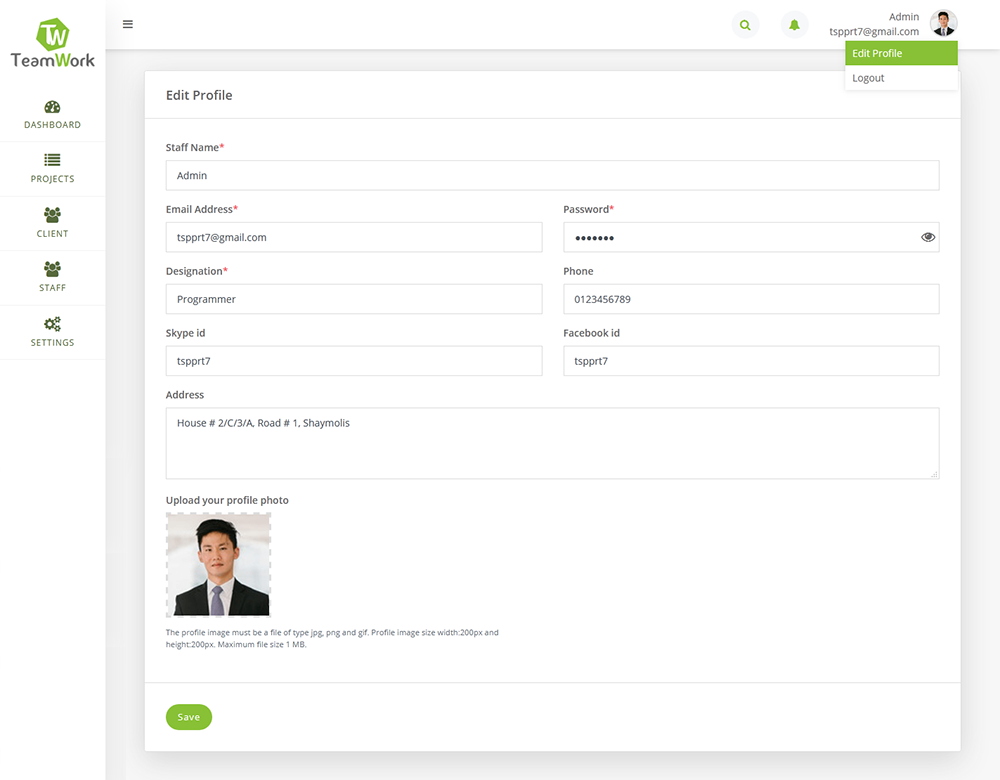
Edit Profile:
- You can change:
- Staff Name
- Email Address
- Password
- Designation
- Phone
- Skype id
- Facebook id
- Address
- Profile photo
#Changelog
- Upgrading
v1.3.2 (09/05/2025)
- Upgrading tcpdf and stripe
v1.3.1 (05/07/2024)
- PHP Upgrading To 8.2 From 8.x
- Included SMTP Feature
- Run database script into existing database.
v1.3.0 (02/09/2023)
- PHP Upgrading To 8.0 From 7.x
v1.2.2 (28/10/2022)
- Added Stripe Payment Method
-
Add/Update Files and Folder:
- teamwork/assets/stripe
- teamwork/global_setting.php
- teamwork/settings.php
- teamwork/js/settings.js
- teamwork/api/Settings.php
- teamwork/api/Combo.php
- teamwork/footer.php
- teamwork/payments.php
- teamwork/js/payments.js
- teamwork/api/Payments.php
- teamwork/invoice-pdf.php
- teamwork/assets/css/style.css
- teamwork/assets/js/jquery-3.5.1.min.js
- jquery-1.12.4.min.js => jquery-3.5.1.min.js - Run database script into existing database.
v 1.2.0 (23/01/2021)
- Zoom Meeting features added
- New Meeting Create
- Upcoming Meeting List
- Live Meeting List
- Previous Meeting List
- Run database script into existing database.
v 1.1.1 (21/08/2020)
- New features added
- Client login system
- Client sign up system
- Client management
- Milestones
- Invoice management
- All reports on client Dashboard
v 1.1.0 (10/04/2020)
- Initial Release
v 1.0.0 (11/01/2020)